

Company documents are the place to share policies, handbooks, announcements and other important information with your employees. You can upload an existing file, write the document directly in IceHrm using the built-in editor, or do both.
This guide walks through creating a company document, writing its content, choosing who can see it, and how employees find it.
Step 1: Open the Documents module
The quickest way in is the search bar at the top of the screen. Type Document and choose Documents (the one marked Manage).
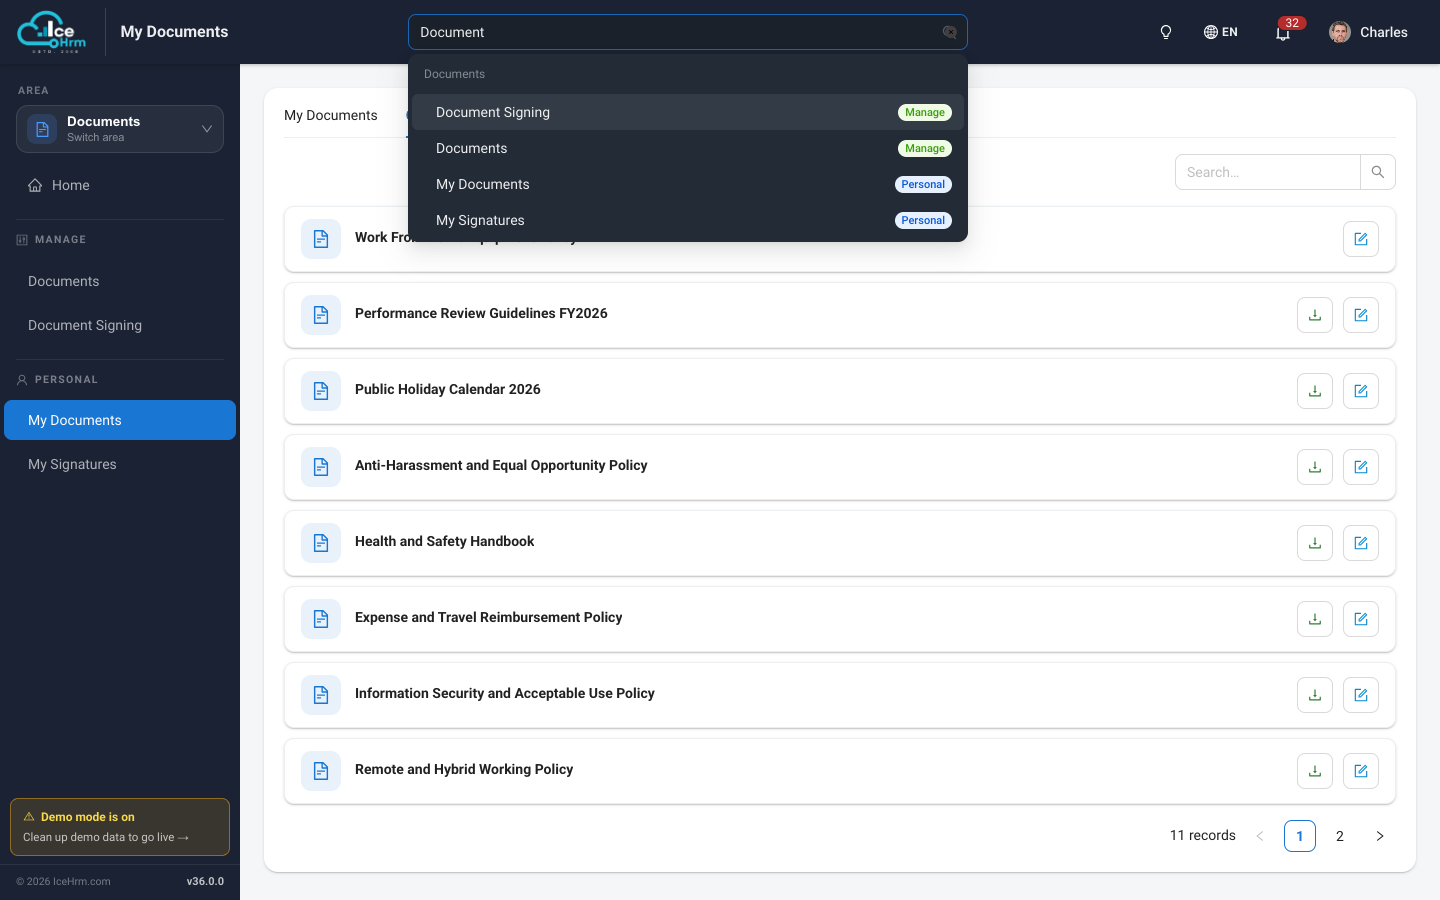
You can also get there from the sidebar: click the Area switcher at the top left, choose Documents, then select Documents under Manage.
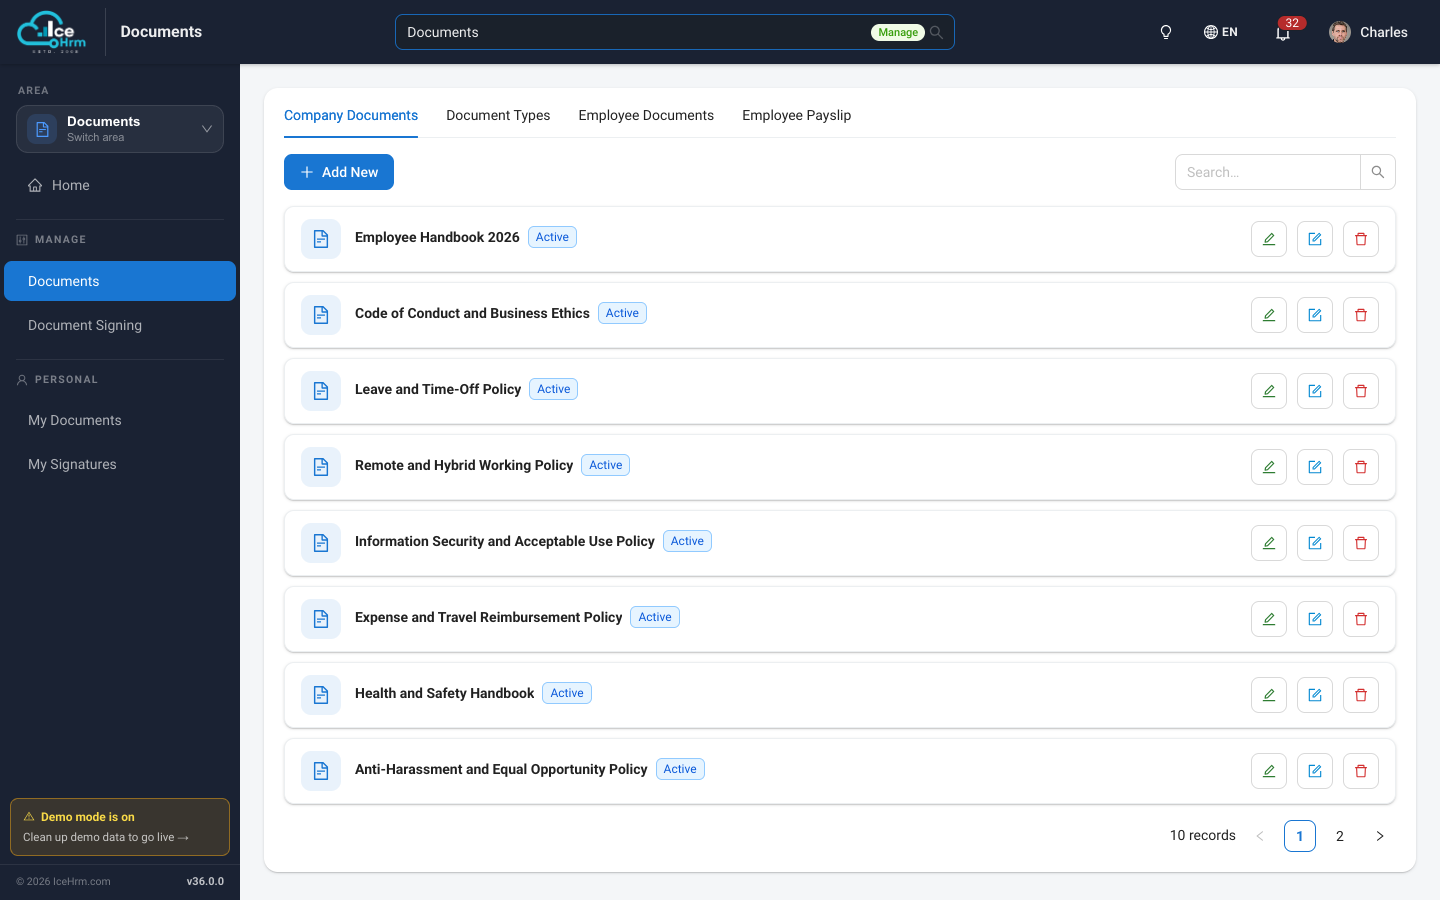
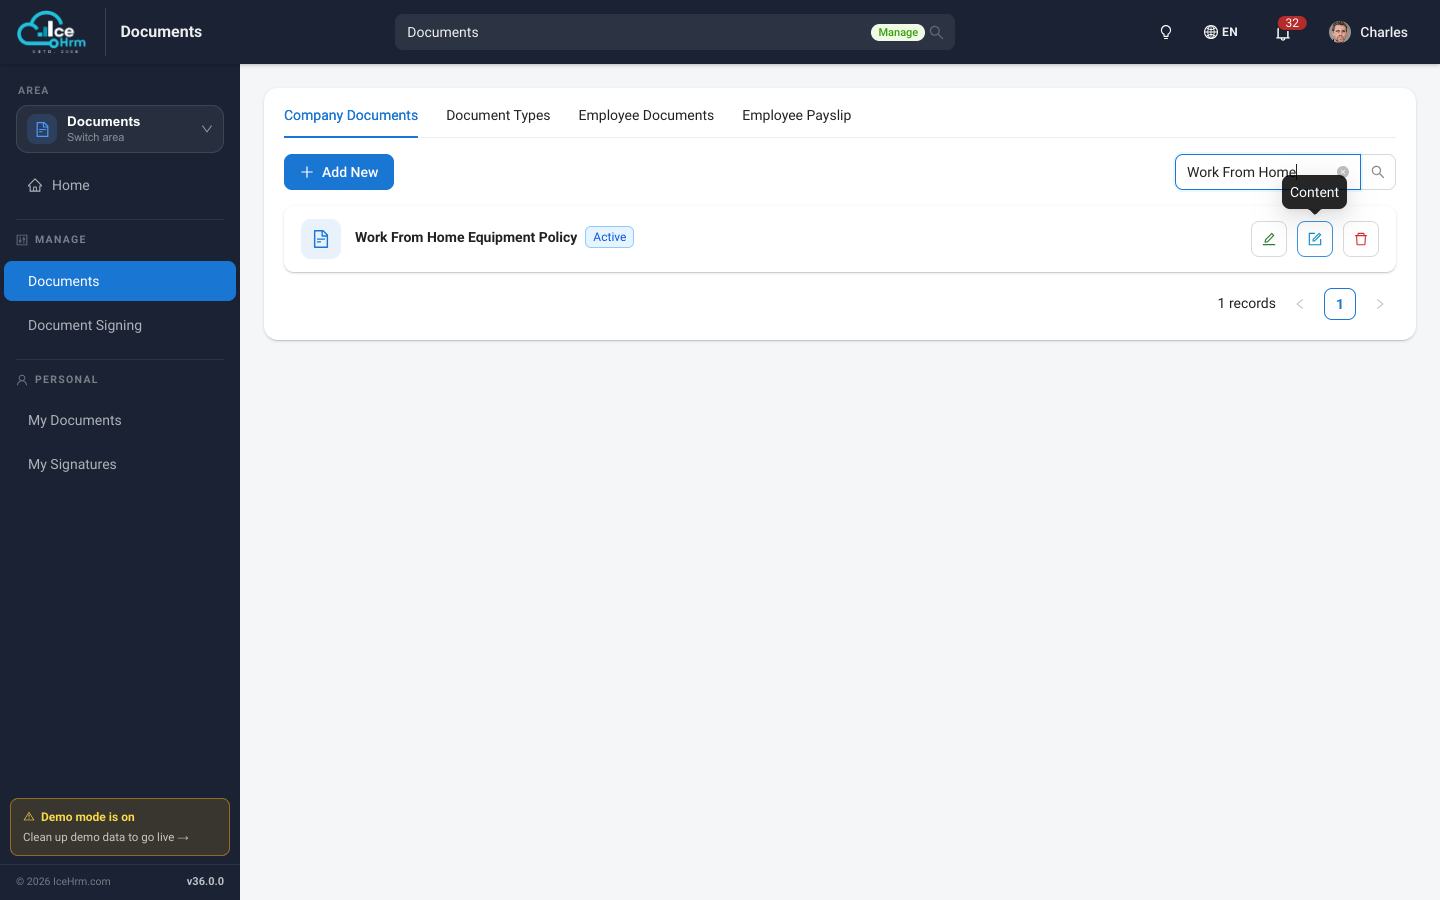
The Company Documents tab lists every company document, with its status. Use the search box on the right to find a document quickly.
Step 2: Add the document
Click Add New and fill in the form:
- Name (required): the title employees will see, for example "Work From Home Equipment Policy".
- Description: a short summary of what the document covers.
- Status (required): choose Active for a document that is in use, or Inactive for one that is not.
- Attachment: optionally upload a file, such as a PDF. Employees will be able to download it.
- Share Departments: the departments whose employees can see the document. In the example below it is shared with the company itself (IceHrm Pty Ltd).
- Share Employees: share the document with specific employees instead of a whole department.
Important: if you don't select any department or employee, only admin users can see the document.
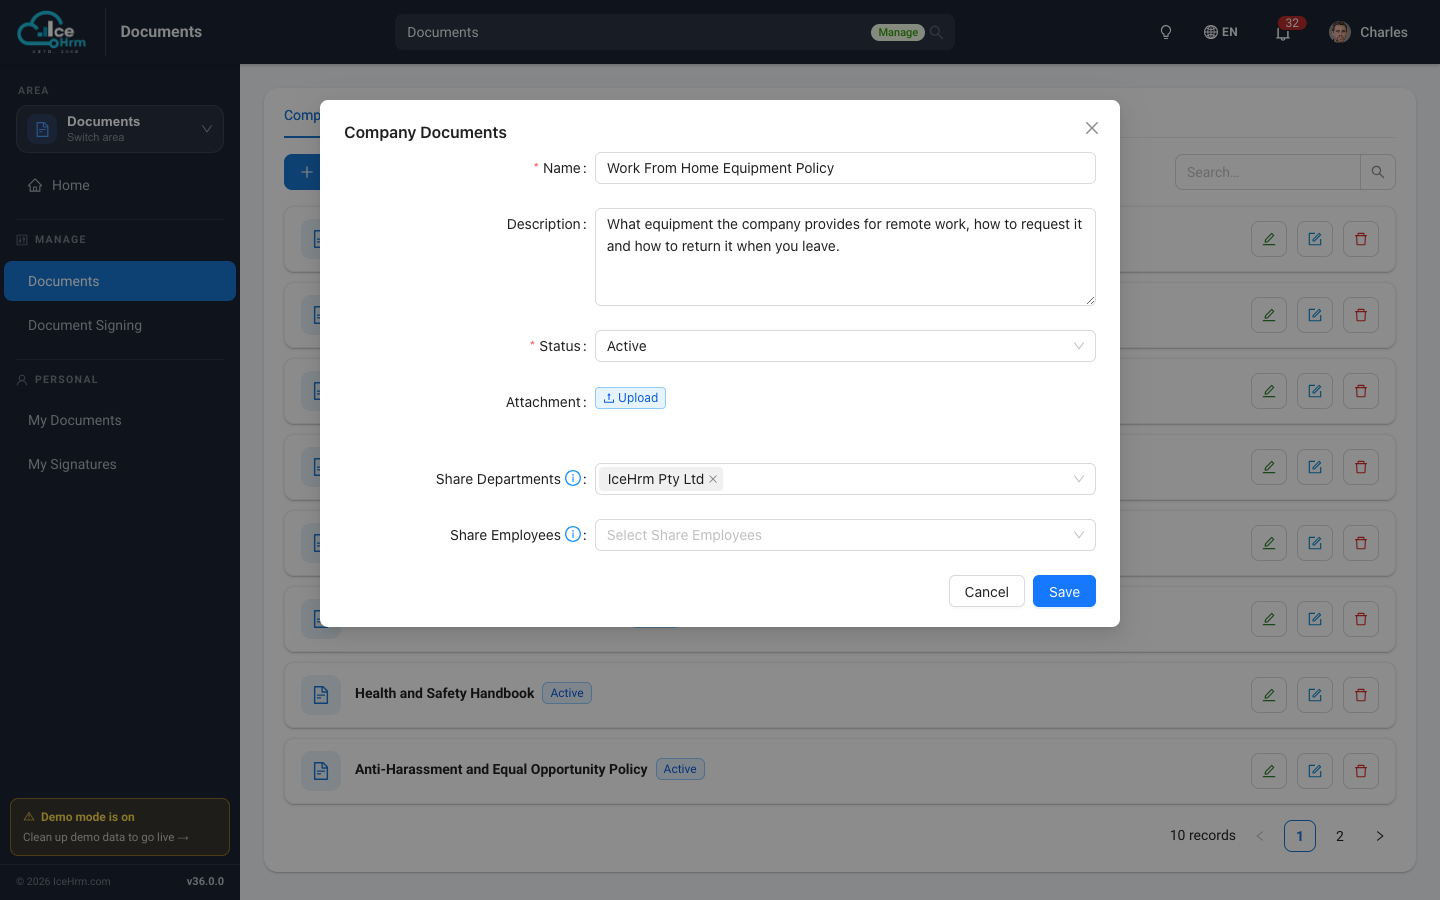
Click Save. The document now appears in the Company Documents list.
Step 3: Write the document content
Each document in the list has three buttons:
- Edit (green pencil): change the name, description, status, attachment or sharing.
- Content (blue): open the editor and write the document itself.
- Delete (red): remove the document.
Click Content to open the editor.
The editor opens with the document name as its title. Replace the "Add the document content here." line with your own text. Press Enter to start a new line.
To add a heading, list or other element, click the + button that appears next to an empty line and choose a block type:
- Text and Heading for paragraphs and section titles
- List and Checklist for bulleted, numbered and tick-box lists
- Quote, Code, Delimiter and Table for other kinds of content
- Image and User Tasks
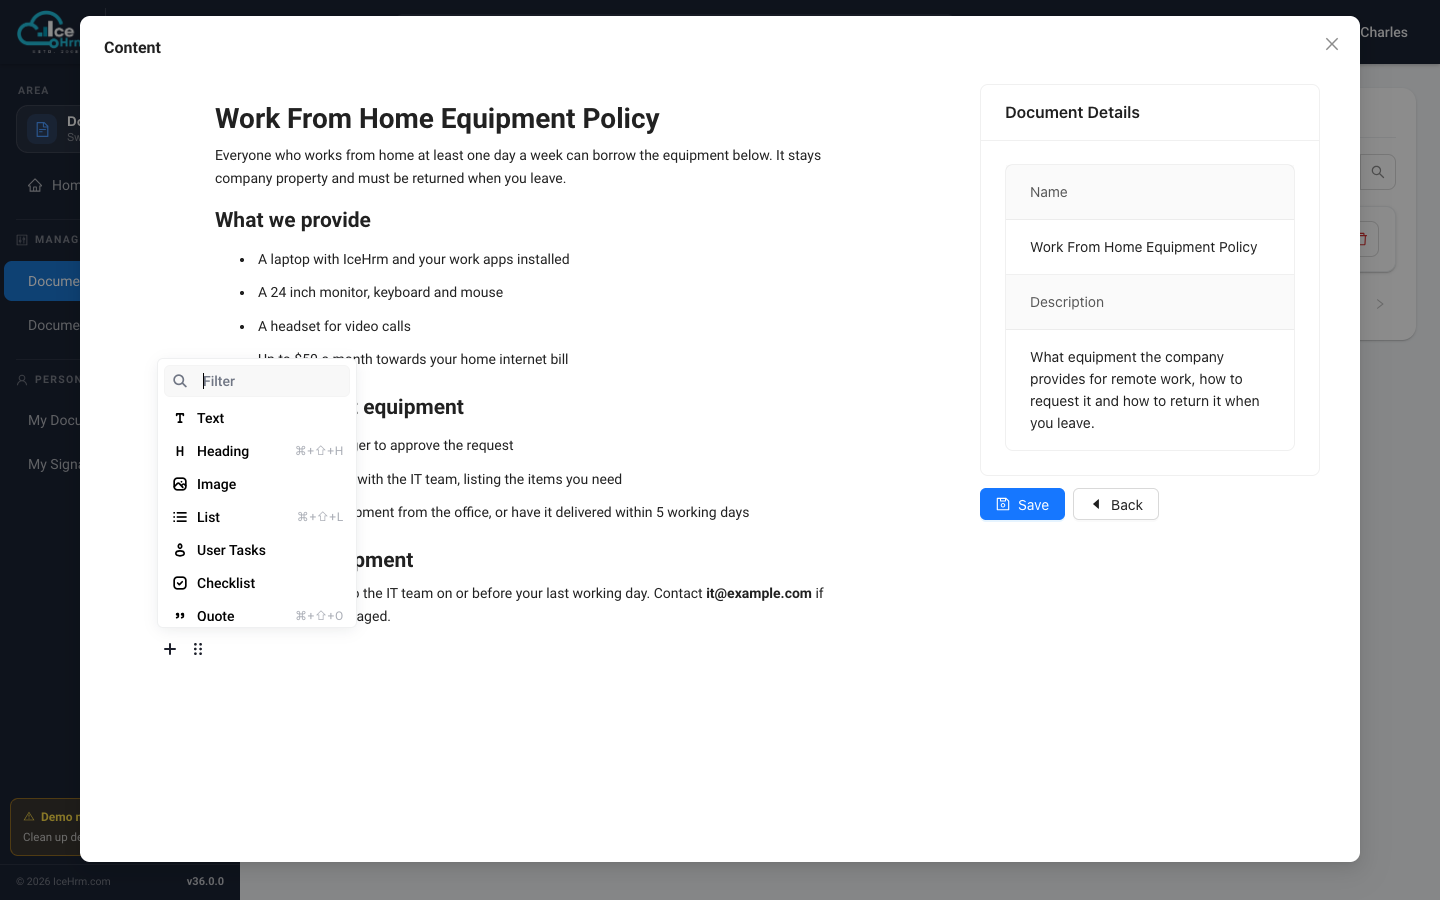
Keyboard shortcuts are shown in the menu: for example ⌘ + Shift + H adds a heading and ⌘ + Shift + L adds a list (use Ctrl instead of ⌘ on Windows). Select text to make it bold or italic, highlight it, or add a link.
The Document Details panel on the right shows the name and description you entered. When the document is ready, click Save. You'll see a "Document saved" confirmation.
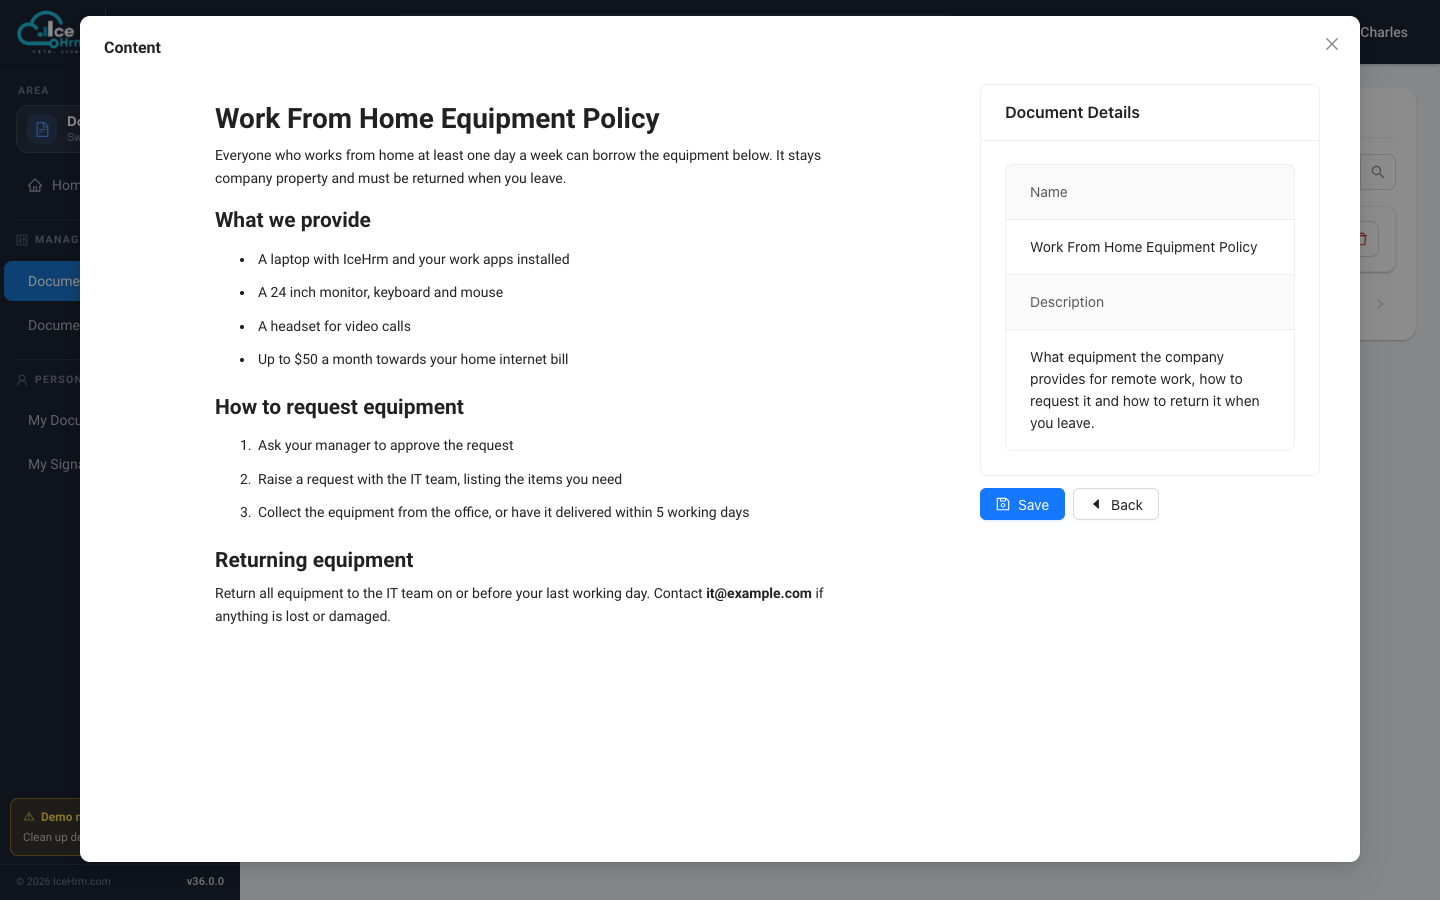
You can come back and update the content at any time using the Content button.
Step 4: How employees see company documents
Employees find the documents shared with them under Documents → My Documents → Company Documents (in the Personal section of the Documents area). They can open a document with the view button, and download its attachment if it has one.
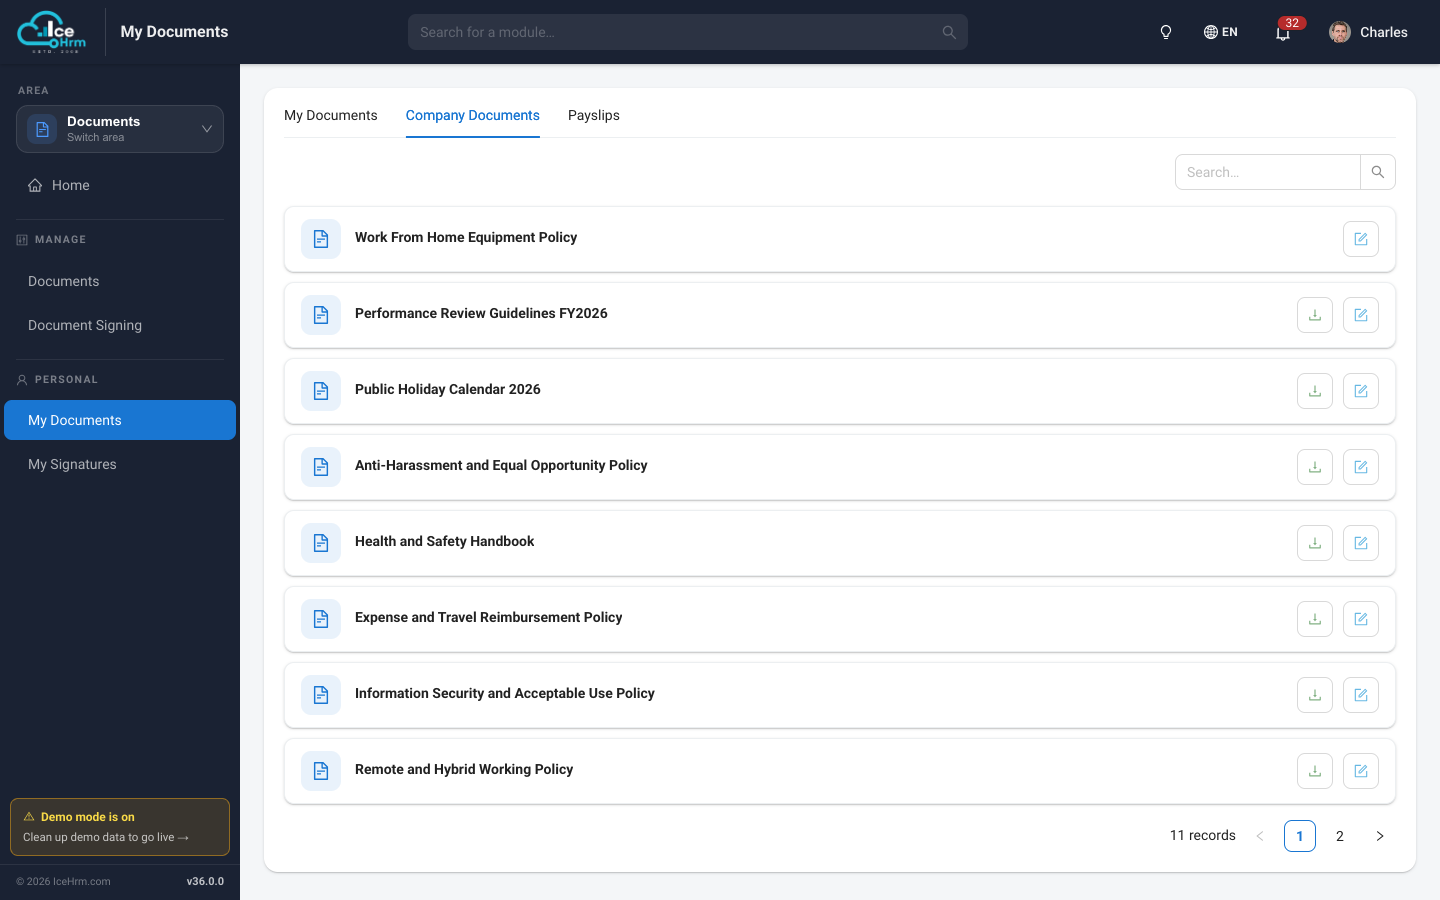
To change who can see a document later, click its Edit button and update Share Departments or Share Employees. Read more about how to change the visibility of a company document.
Want to learn more? Explore the IceHrm Documents module and everything else IceHrm can do for your HR team.