Focus on your people, not your servers. IceHrm Managed Hosting provides enterprise-grade security, automatic backups, and seamless updates so you're always running the latest version. Get instant access to all marketplace extensions and enjoy 99.9% uptime with our fully managed infrastructure.
1. Log into the employee’s account and go to the Finance module.
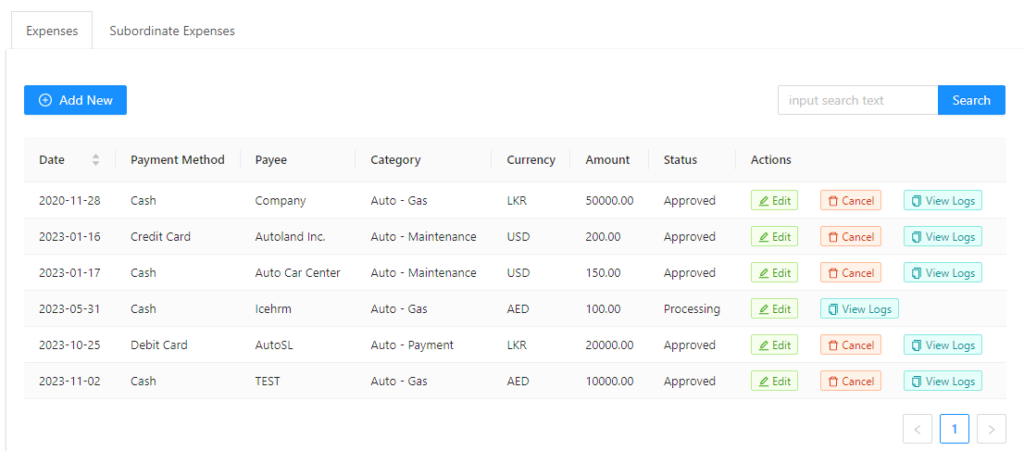
2. Click on the Expenses tab
3. Under the Expenses tab, click on Add New to create a new expense
4. Fill the necessary fields
· Date — Add the date of the expense
· Payment method — Select the payment method whether cash, cheque or card payment
· Payee — Name of the employee needs to get the payment
· Expense Category — Select the expense category accordingly
· Currency — Enter the currency which needs to be paid in
· Amount — Enter the total amount of expense
In addition to this, you can request your employees to attach proofs here. For example, they can attach a receipt of the expense.
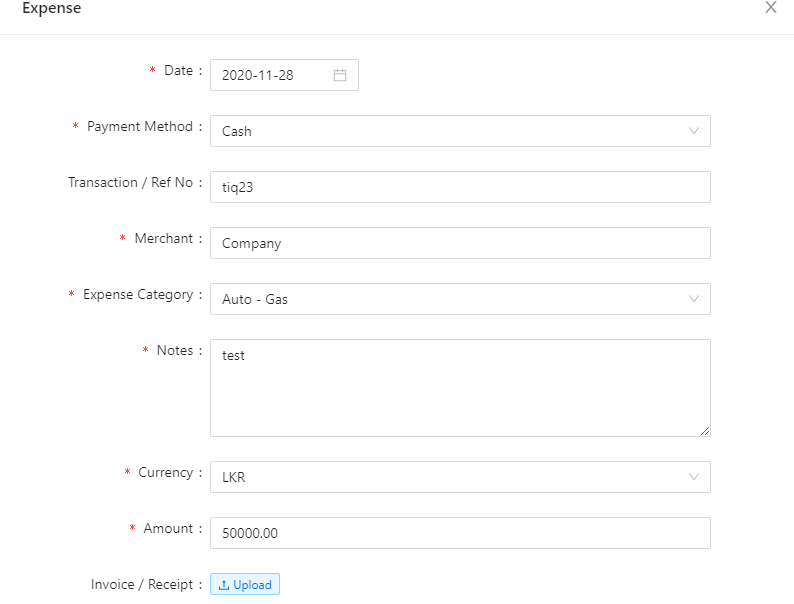
5. Then Save
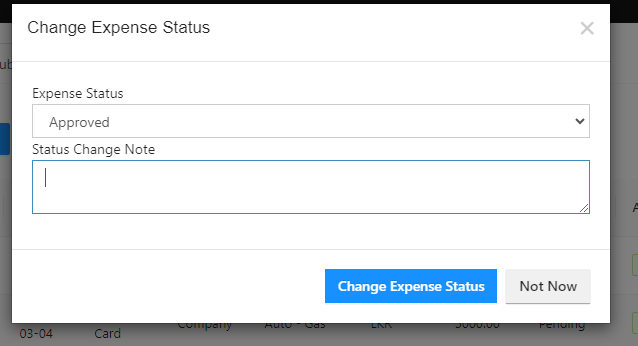
Once an employee requests an expense, the manager will receive a notification as below.
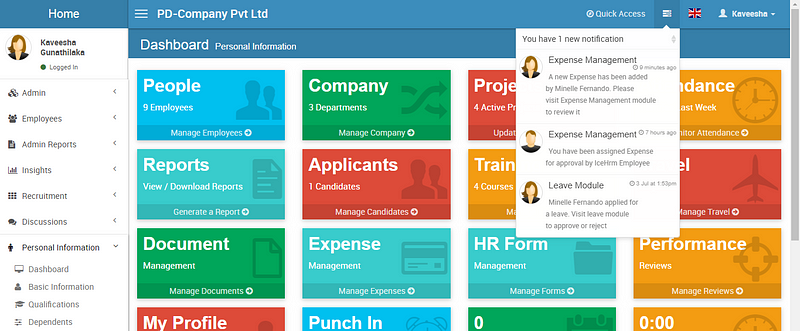
You can click on the notification to proceed. If not,
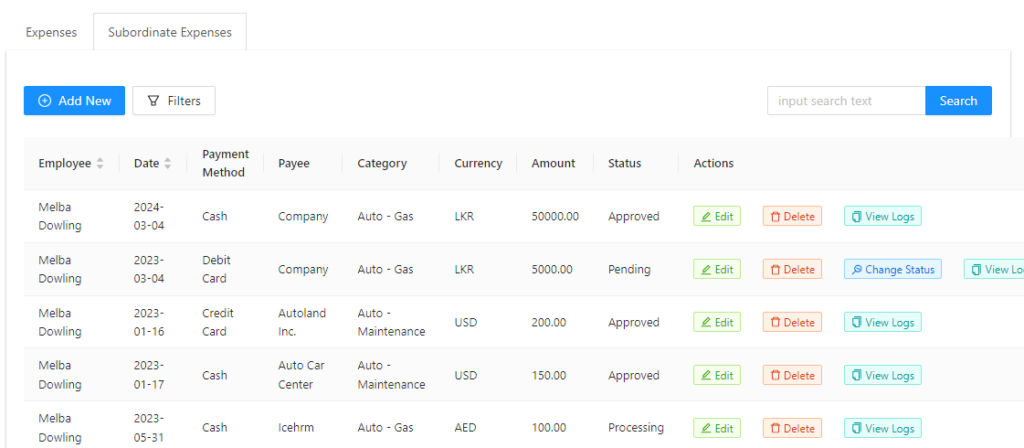
5. Change the status to Approved and then click on the Change Expense Status option