This documentation is relevant only to self-hosted installations of IceHrmPro or IceHrm Community.
Upgrading IceHrm
IceHrm updates itself from the admin panel. When a new release is available, IceHrm tells you, and the built-in IceHrm Updater downloads the release, backs up your current files, and replaces them. No command line access is needed.
How you are notified
When a newer version is published, administrators see a notice at the top of the admin panel. It shows the version you are running and the version available, and reminds you that your settings, uploads and data are kept and that the previous version is backed up so the update can be undone.

Click the update link in the notice to open the IceHrm Updater. The link is time-limited, so if you come back later and it has expired, open the notice again to get a fresh one.
Step 1: Sign in to the updater
The updater asks you to sign in with an IceHrm administrator account. It checks your credentials against the IceHrm database, so use the same email and password you use for the admin panel.
Step 2: Review the pre-update checks
Before anything is downloaded, the updater checks that your server is ready:
- PHP zip extension is installed, so the release can be unpacked
- PHP curl extension is installed, so the release can be downloaded
- Database connection works, so administrators can sign in
- updater/data is writable, since it holds the download, the extracted files and the backup
- IceHrm directory is writable, since the update replaces
core/,web/,app/,bin/and the extension directories - Free disk space is enough for the download, the extracted files and a backup of your current installation
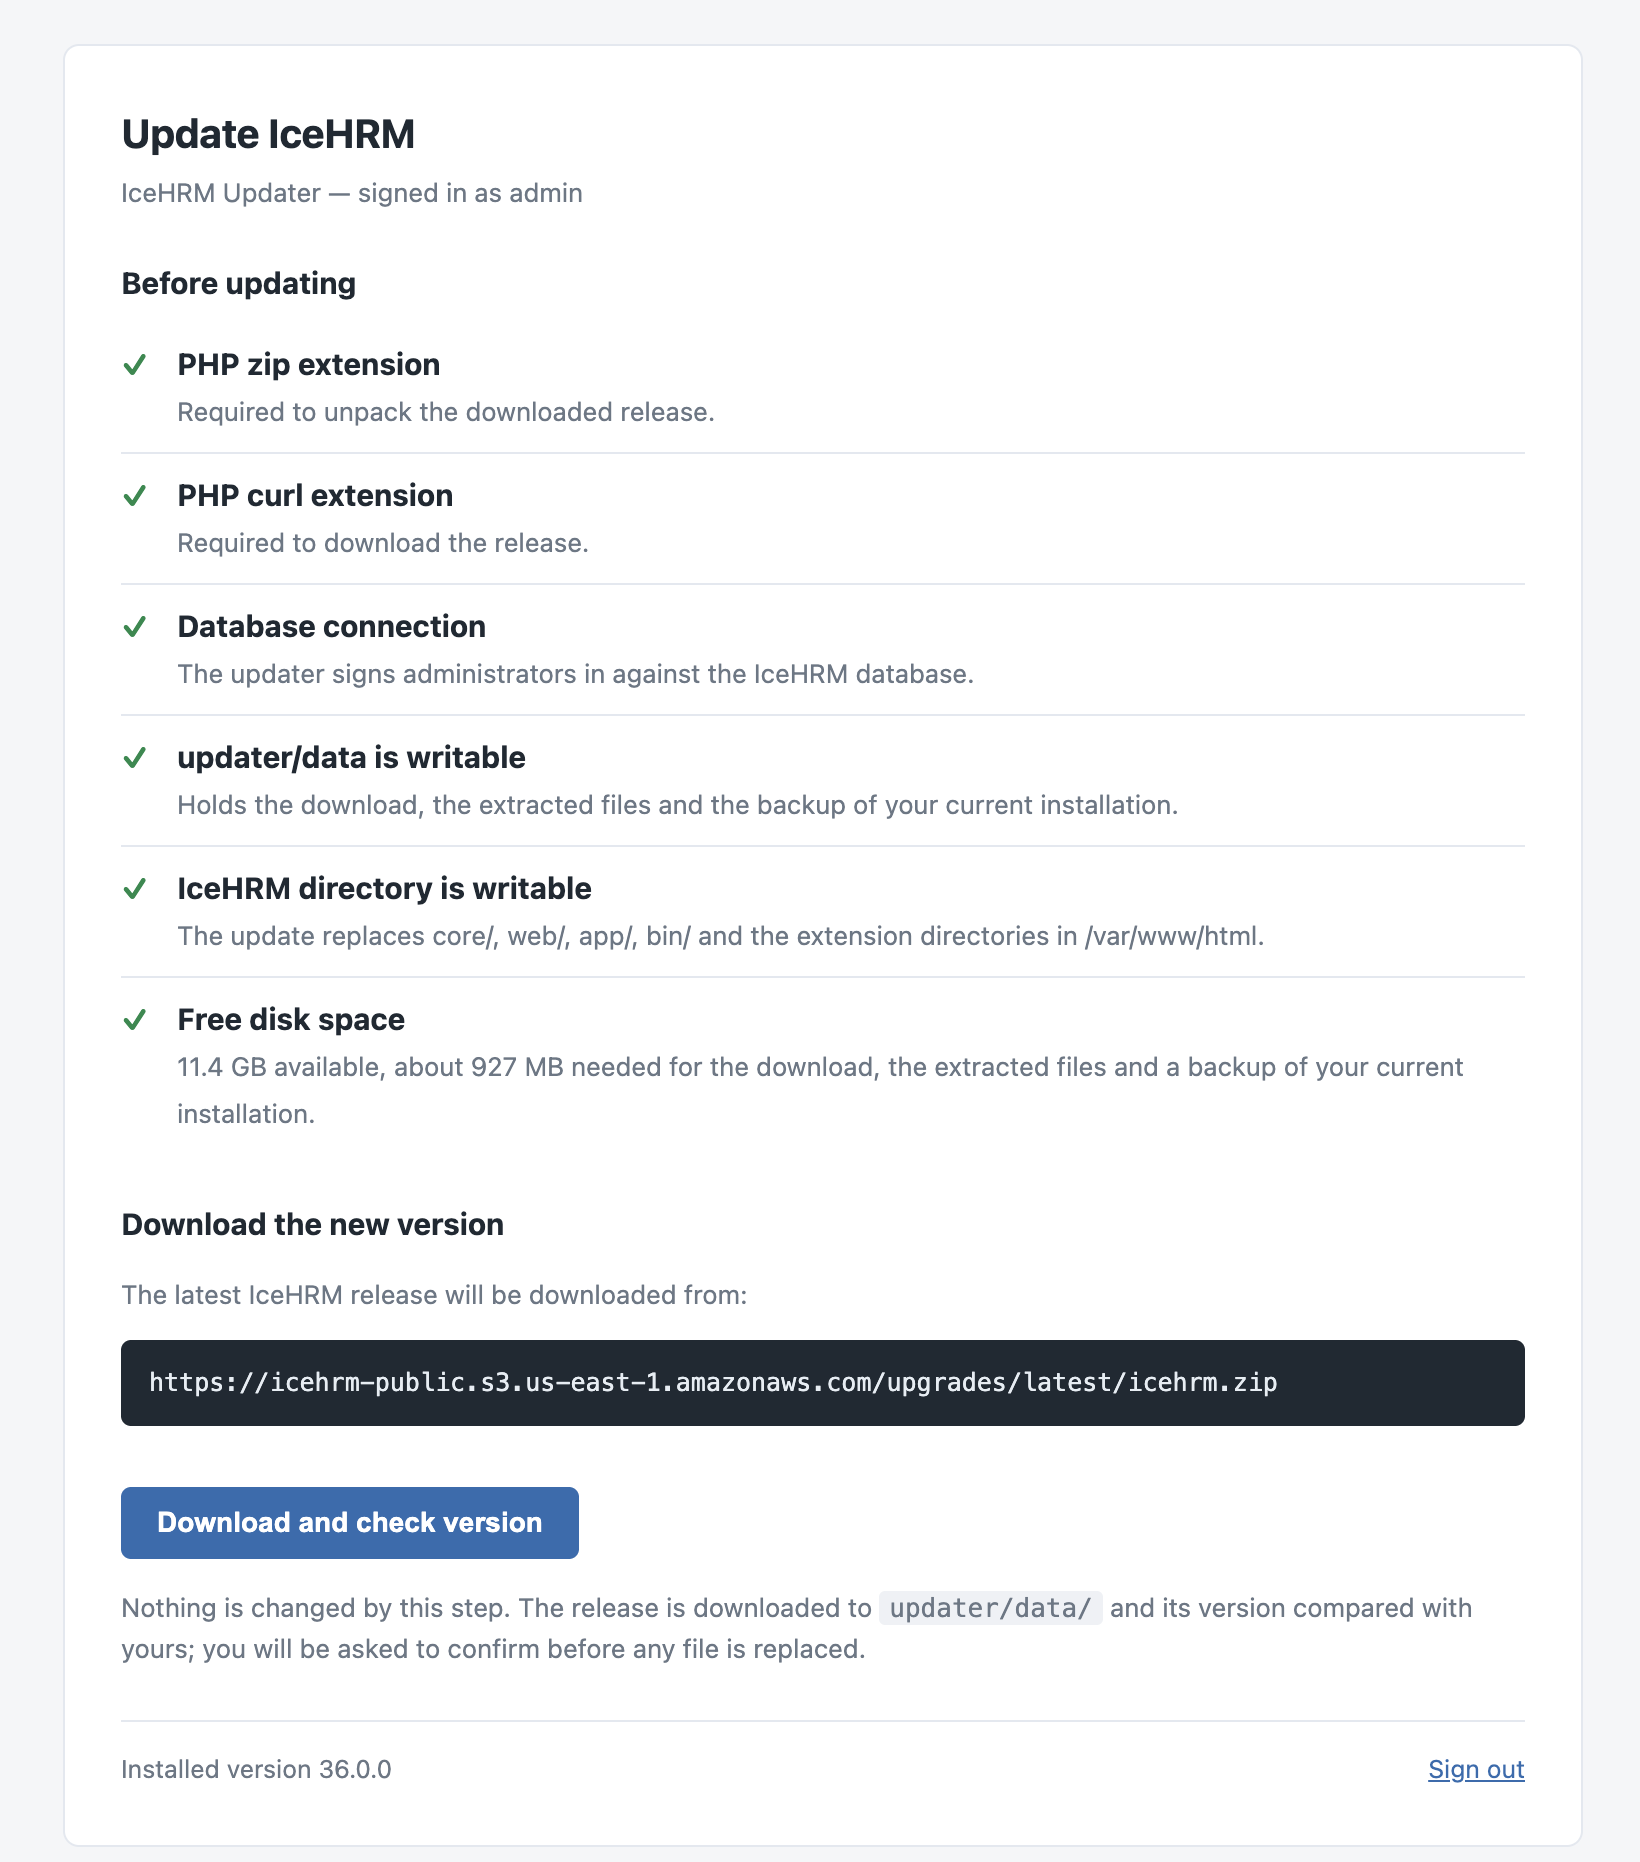
Every check must show a green tick before you can continue. If one fails, the message under it explains what to fix. Typically this means installing a PHP extension, making the directory writable by the web server user, or freeing disk space. Reload the page after fixing the problem and the checks run again.
Step 3: Download and check the version
Click Download and check version. Nothing on your installation is changed by this
step. The updater downloads the latest release into updater/data/, extracts it, and
compares its version with the one you have installed.
You are then asked to confirm before any file is replaced. If the downloaded release is not newer than your installation, the updater tells you and stops.
Step 4: Confirm the update
Confirm to apply the update. The updater:
- Copies your current files to a timestamped backup folder inside
updater/data/ - Replaces the program directories with the new release
- Leaves your configuration, uploaded files and database untouched
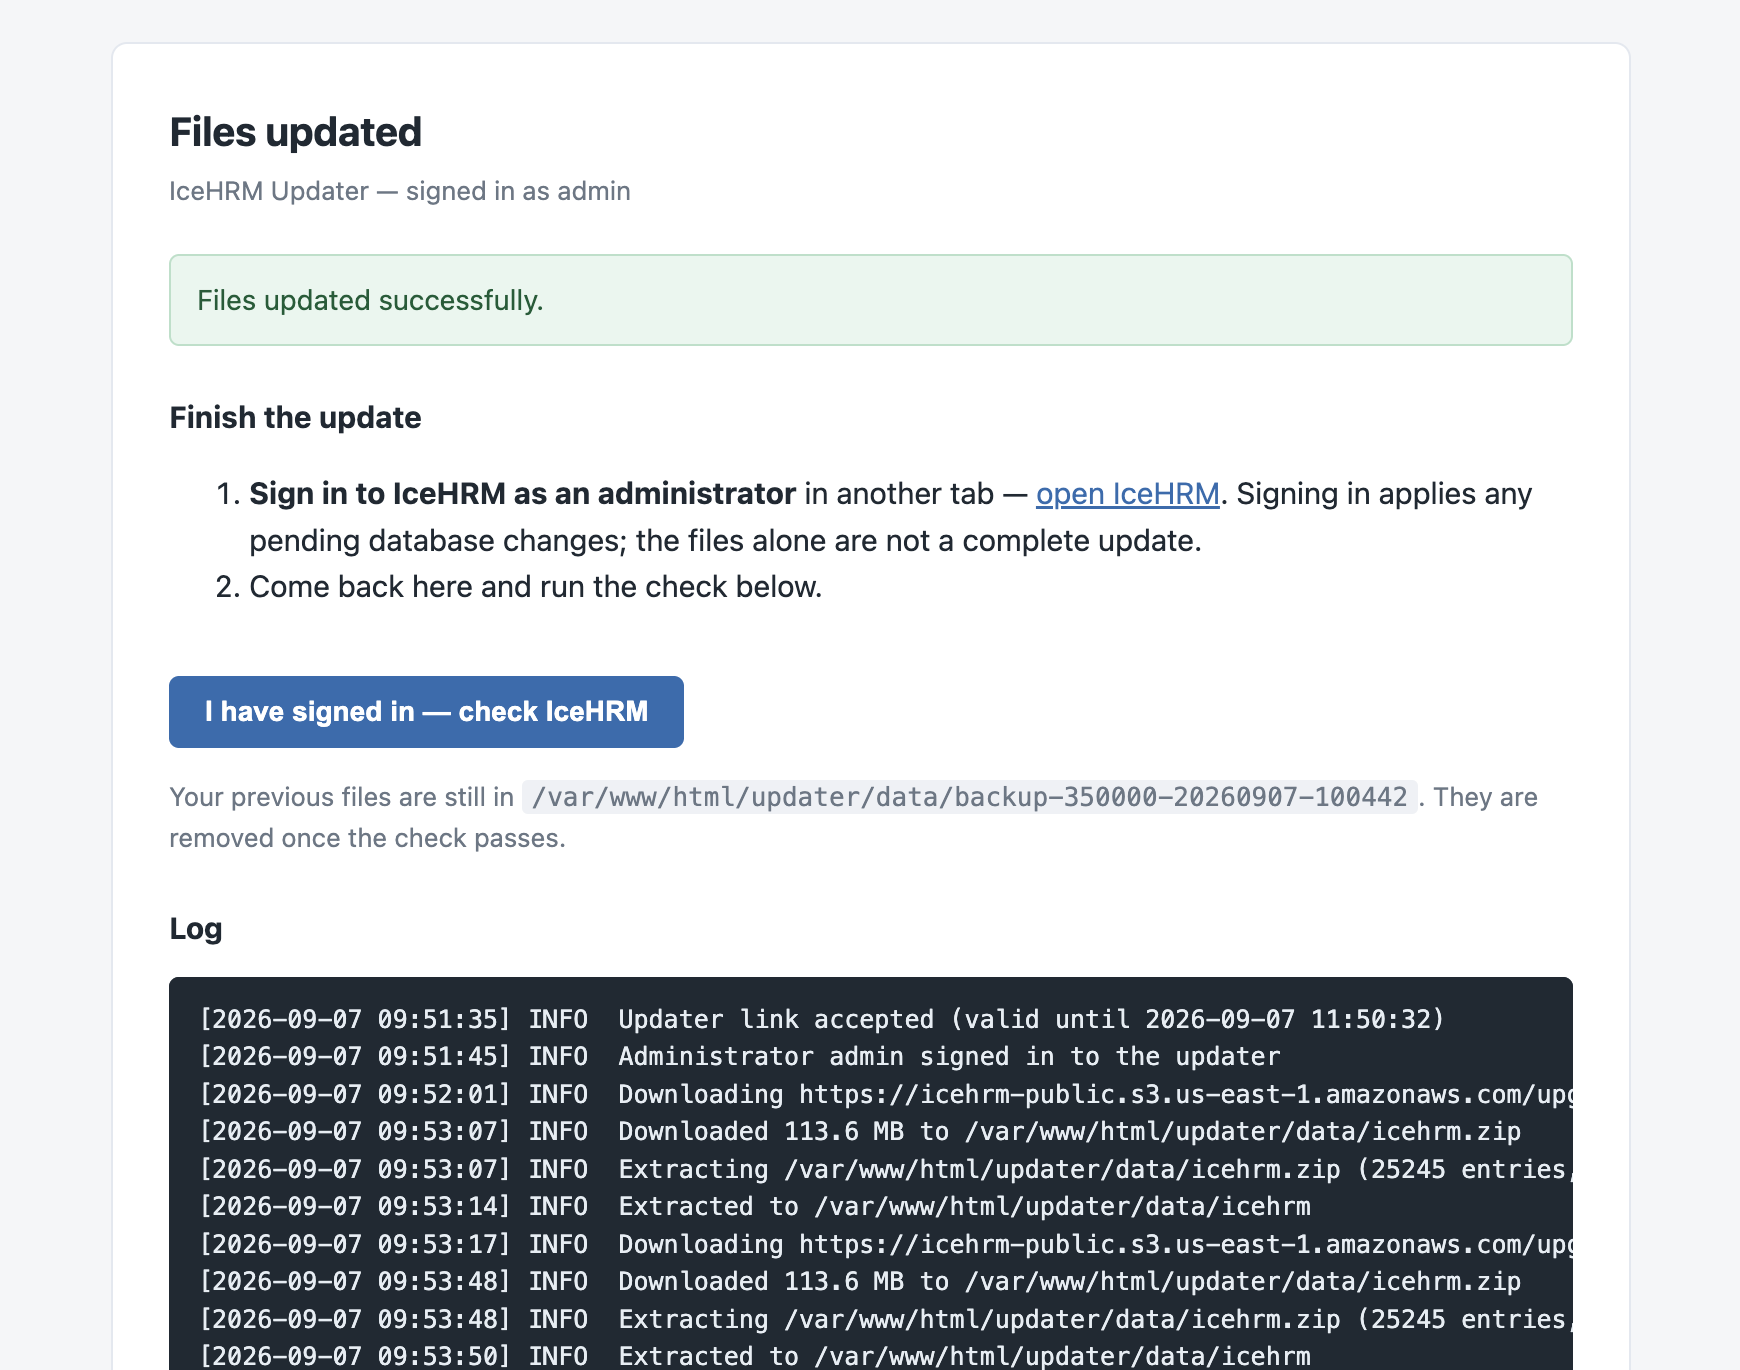
When it finishes, you see the Files updated screen.
Step 5: Finish the update
Replacing the files is only half of the update. Database changes are applied when an administrator signs in to IceHrm.
- Open IceHrm in another tab using the open IceHrm link and sign in as an administrator. Any pending database migrations run at this point.
- Return to the updater tab and click I have signed in — check IceHrm.
The updater verifies that IceHrm is running the new version. Once the check passes, the backup of your previous files is removed and the update is complete.
If you need to inspect what happened, the Log section at the bottom of the page lists every step the updater took, including download sizes and file locations.
Undoing an update
Until the final check passes, your previous files remain in the backup folder shown
on the Files updated screen, inside updater/data/. If something goes wrong before
you complete Step 5, you can restore that folder over the IceHrm directory to return
to the previous version.
Upgrading to IceHrm Pro
If you have purchased an IceHrm Pro subscription, the same updater moves your Community installation to Pro. See Upgrading to IceHrm Pro.
Troubleshooting
A pre-update check fails
- Install the missing PHP extension and restart PHP or the web server
- Make sure the IceHrm directory and
updater/data/are writable by the web server user - Free up disk space if the space check fails
The download fails
- Confirm the server can reach the internet and that outbound HTTPS is allowed
- Check the Log section for the exact error
White screen after the update
- Check the web server error log for PHP errors
- Verify file permissions on the replaced directories
- Clear all caches
Missing features after the update
- Make sure you signed in as an administrator after the files were updated, so database migrations ran
- Clear your browser cache
- Check extension compatibility
The updater cannot be used on your server
- Follow the Manual Upgrade guide instead
Getting help
- Check the IceHrm documentation
- Search the GitHub issues
- Contact IceHrm support (Pro users)