This documentation is relevant only to self-hosted installations of IceHrmPro or IceHrm Community.
Manual Upgrade
Use this guide when the built-in IceHrm Updater cannot be used on your server. The process is the same for IceHrm Community Edition and IceHrmPro. The only difference is where you download the release from.
In short, you download the new release, unzip it, and copy a handful of folders over your current installation. Your data, uploads and settings live in two places that you must never touch, and this guide points them out at every step.
Before you begin
- Make a backup. Copy your whole IceHrm folder somewhere safe and export your database. If anything goes wrong, you can put the copy back.
- Get access to the files. You need a way to delete and copy folders on your server, such as your hosting control panel's file manager, an FTP/SFTP client like FileZilla, or a terminal.
- Know where IceHrm is installed. This guide calls that folder
<current-installation>. On many servers it is something like/var/www/htmlor/var/www/icehrm. - Ask users to sign out. IceHrm is unavailable for a few minutes while files are replaced.
Step 1: Download the release
IceHrm Community Edition
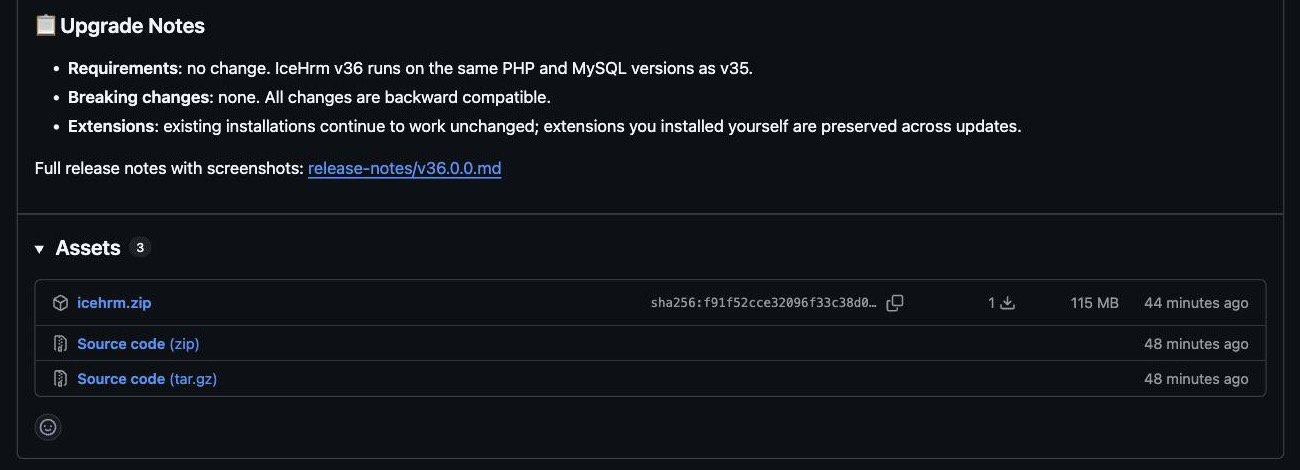
- Open the IceHrm releases page on GitHub.
- The newest release is listed first. Scroll to its Assets section.
- Click icehrm.zip to download it.
IceHrmPro
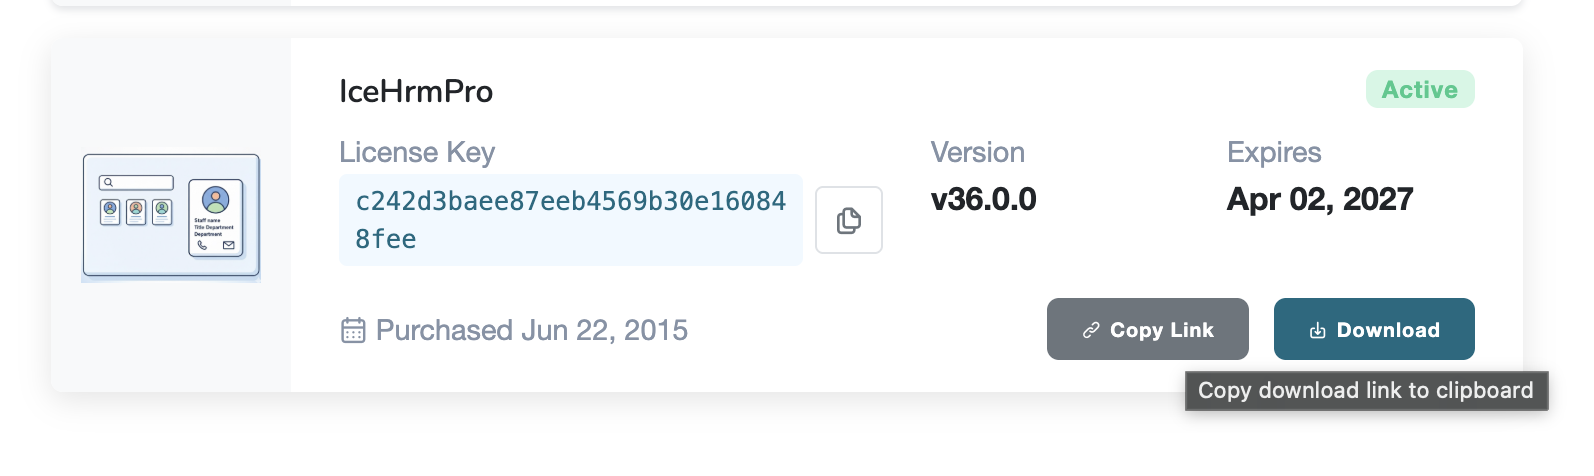
- Sign in to your icehrm.com account with the email address you used when purchasing IceHrmPro.
- Find IceHrmPro in your purchases.
- Click Download to download the release zip.
Step 2: Extract the zip
Unzip the file you downloaded. On most computers you can double-click the zip to
extract it. You get a folder that looks like this. This guide calls it
<extracted-zip>.
<extracted-zip>/
├── app/
├── bin/
├── core/
├── data/
├── docs/
├── extensions/
├── extensions-pro/        (IceHrmPro only)
├── release-notes/
├── updater/
├── web/
├── Dockerfile, docker-compose.yaml and other Docker files
├── favicon.ico
└── LICENSE
You only need four of these folders, plus the contents of app/. The rest can be
ignored.
Step 3: Replace the program folders
Four folders are replaced completely. For each of the folders below, do the same two things: delete the old folder from your installation, then copy the new one in from the extracted zip.
The folders are:
coreextensionsextensions-pro(IceHrmPro only. Skip this one if it is not in your zip.)web
For each folder:
- In
<current-installation>, delete the folder. For example, delete<current-installation>/core. - From
<extracted-zip>, copy the folder of the same name into<current-installation>. For example, copy<extracted-zip>/coreso that it becomes<current-installation>/core.
Repeat for extensions, extensions-pro and web.
If you added your own extensions to the extensions folder, copy them somewhere
safe before deleting it, and copy them back in after the new folder is in place.
Do not do this for the app folder. The app folder is handled differently in
the next step, because it holds your data.
Step 4: Update the app folder
<current-installation>/app/data holds every file your users have uploaded, and
<current-installation>/app/config.php holds your database connection and
settings. If either one is deleted or replaced, your installation stops working and
uploaded files are lost.
Do not delete the app folder. Do not copy the whole app folder from the
zip over it. Only copy the individual items inside it, as described below.
- Open
<extracted-zip>/app. - Select everything inside it except the
datafolder. - Copy the selected files and folders into
<current-installation>/app. - When asked whether to replace existing files, choose replace or merge.
This updates the program files inside
appwhile leavingapp/dataandapp/config.phpuntouched, because the zip does not contain aconfig.phpand you did not selectdata.
When you are done, <current-installation>/app/data and
<current-installation>/app/config.php should be exactly as they were before.
Step 5: Finish the upgrade
- Open IceHrm in your browser and sign in as an administrator. Signing in applies any database changes the new version needs. The first sign-in after an upgrade can take a little longer than usual.
- Check the version shown in the admin panel matches the release you downloaded.
- If pages look wrong, clear your browser cache and reload.
If something goes wrong
Restore the backup you made before starting. Copy your backed-up IceHrm folder back
over <current-installation> and, if you changed anything in the database, import
the database export. That returns you to the version you were running before.
Related topics
- Upgrading IceHrm using the built-in updater
- Upgrading to IceHrm Pro
- Requirements