Reviewing and Approving Expenses
HR and managers review employee claims from Pay & Expenses > Expenses (the Manage section), on the Employee Expenses tab. Every claim shows who submitted it, the date, payment method, payee, category, amount, and current status.
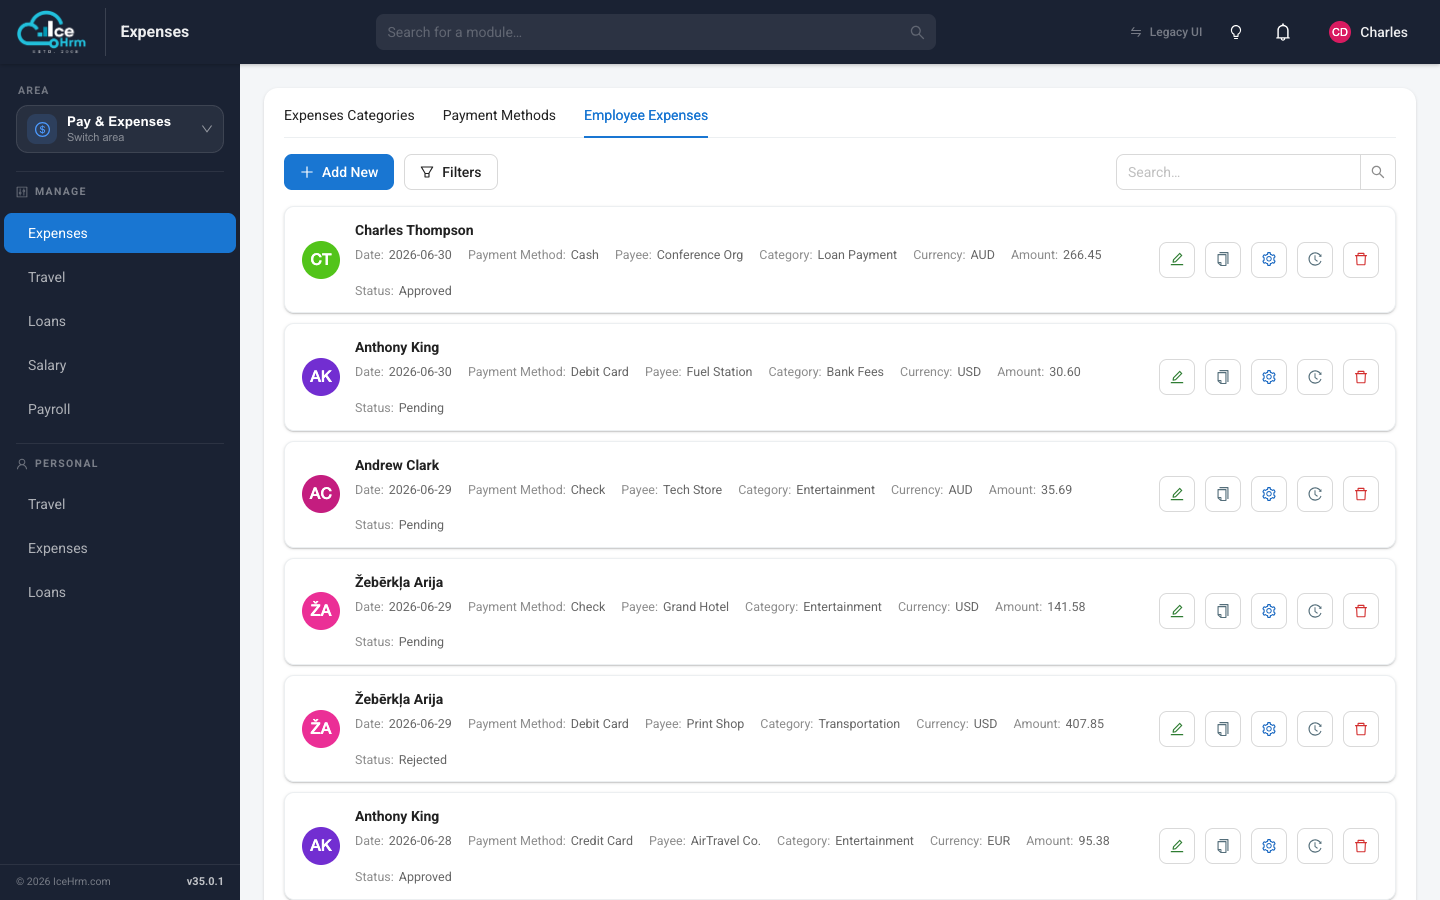
Use Filters to narrow the list — for example, to show only pending claims.
Reviewing a claim
Click a claim card (or the View button) to open the expense dialog. It shows the full detail — amount, date, payment method, payee, transaction reference, and notes — along with any receipts the employee attached (images preview inline, other files download). A Status History panel on the right lists every status change and every approval-level decision, newest first, so you can see the whole trail at a glance.
Changing a claim's status
You can change the status two ways:
- From the claim's settings (gear) button in the list, or
- From inside the expense dialog, using the Change Status dropdown.
Either way, pick the new status — typically Approved, Rejected, or Paid — enter a reason, and click Update.
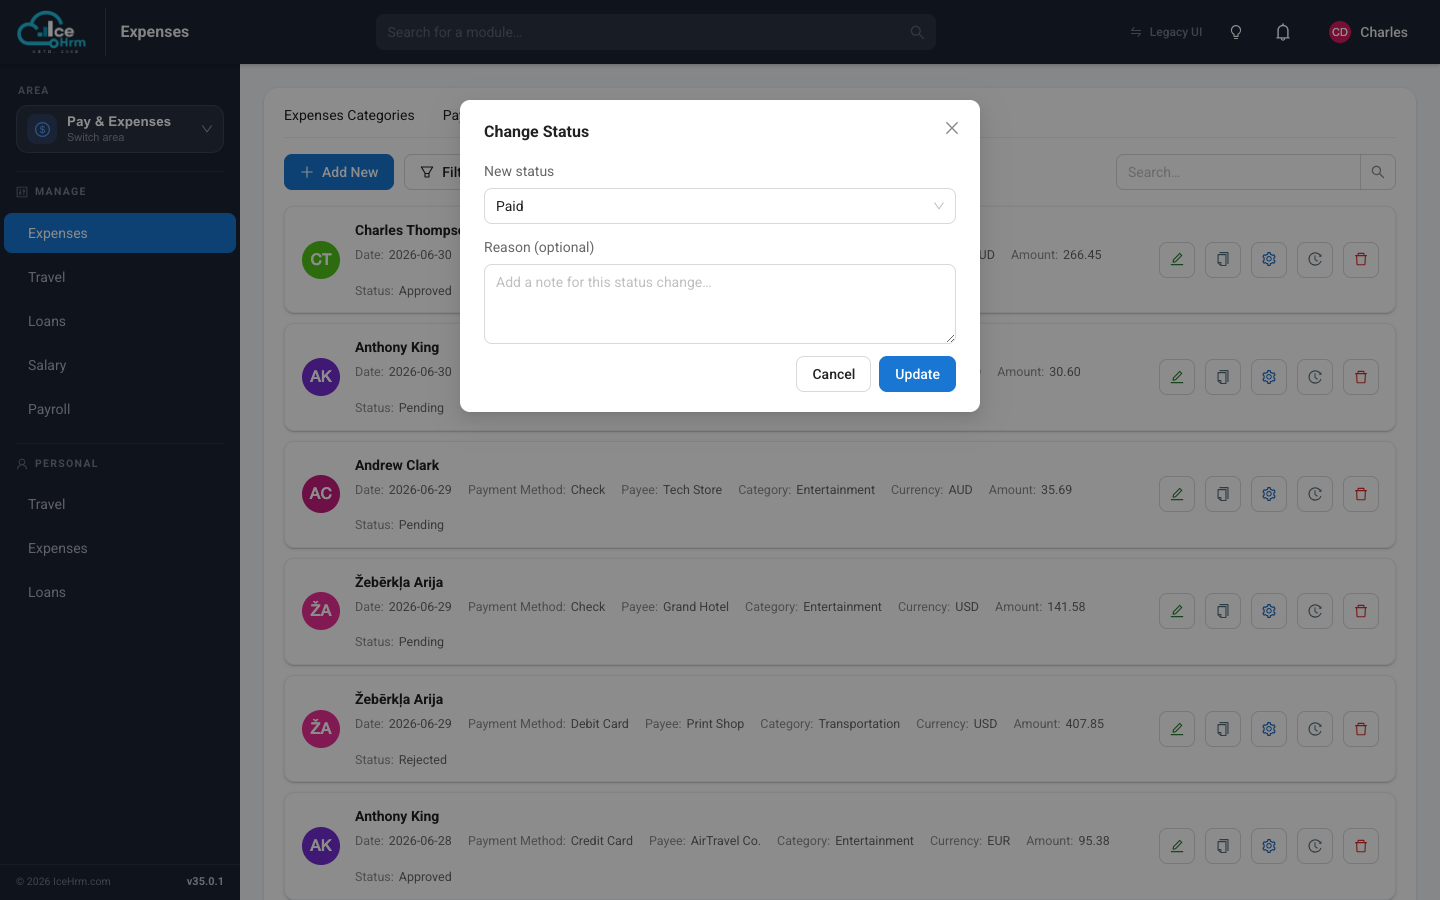
A reason is now mandatory on every expense status change. The Update button stays disabled until you enter one. The reason is saved and shown in the claim's Status History, so there's a permanent record of why each decision was made.
When you change status from within the dialog, it refreshes in place — the new status and a fresh history entry appear immediately. The employee sees the updated status on their own Expenses page.
What managers can and can't do
Managers and admins both review, approve, and reject claims, but a few actions are reserved for admins:
- Managers can't edit the contents of an employee's claim — only the employee who owns it (or an admin) can change its fields.
- Managers can't mark a claim as Paid, and can't change the status of a claim that's already Paid. Settling and re-opening paid claims is an admin action.
- Managers can still delete a claim while it's Pending.
A typical flow
- Employee submits a claim → Pending.
- Manager reviews it → Approved (or Rejected with a reason).
- Finance (admin) settles it → Paid.