Using Timesheets
A timesheet records the hours an employee worked in one week, split by project. This page covers the full workflow: filling in a timesheet, submitting it, and approving it as a manager.
Where timesheets live
Open the Time and Work area and choose Time Sheets in the Personal section. The tabs across the top filter your weeks: All My Timesheets, Approved, Pending, and Rejected. Managers get one more — Direct Reports — for their team's timesheets.
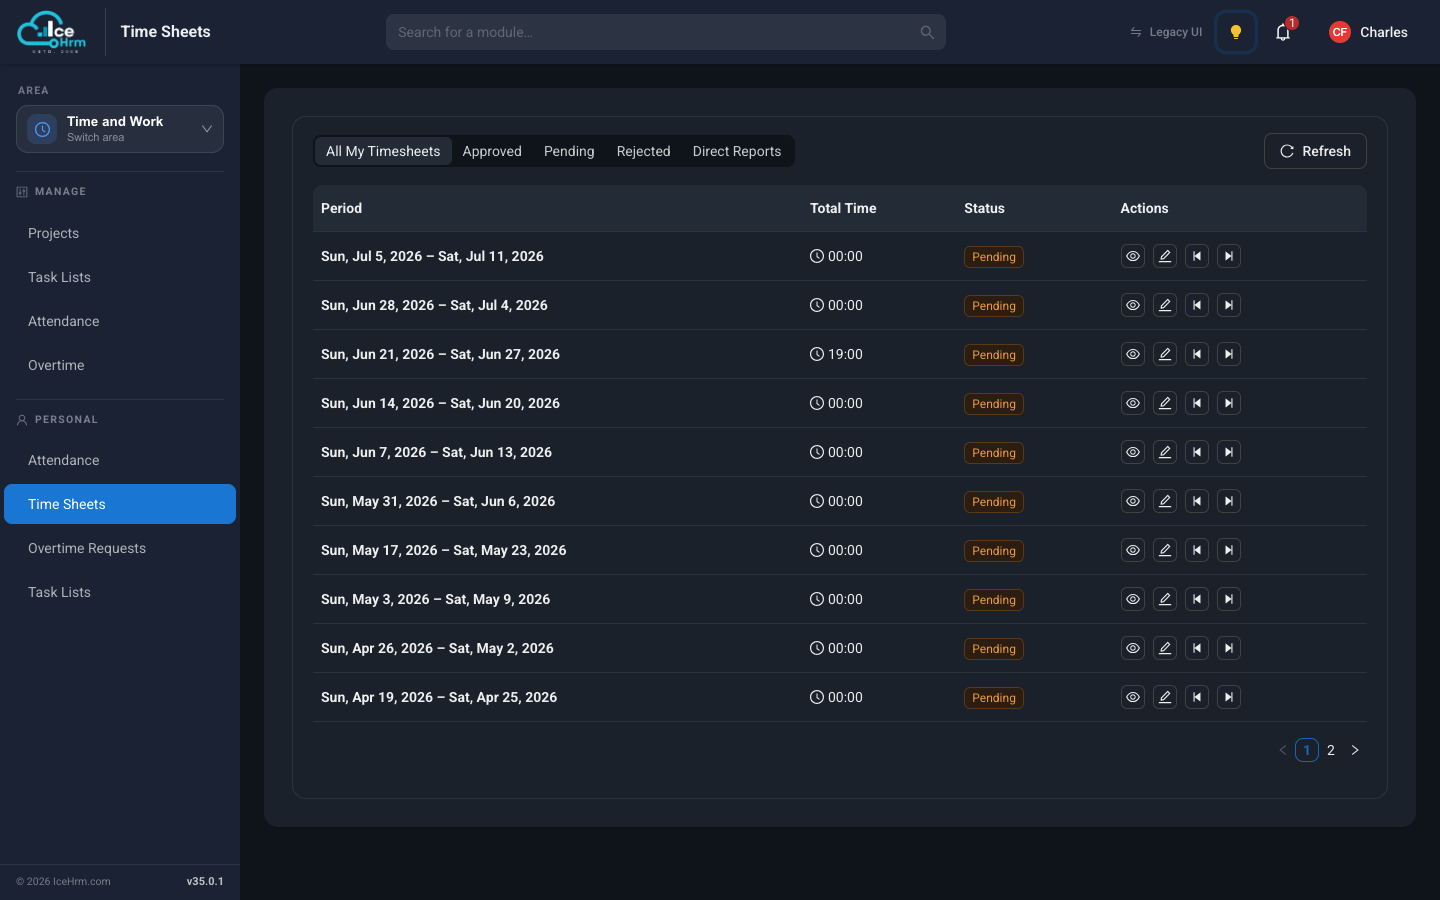
The current week is created automatically. Use the arrow buttons on a row to create earlier or later weeks when you need them.
Filling in your timesheet
- Find the week and click the edit button.
- Add an entry for each block of work: the start and end time, and the project it belongs to.
- Save your entries — the week view shows them laid out day by day.
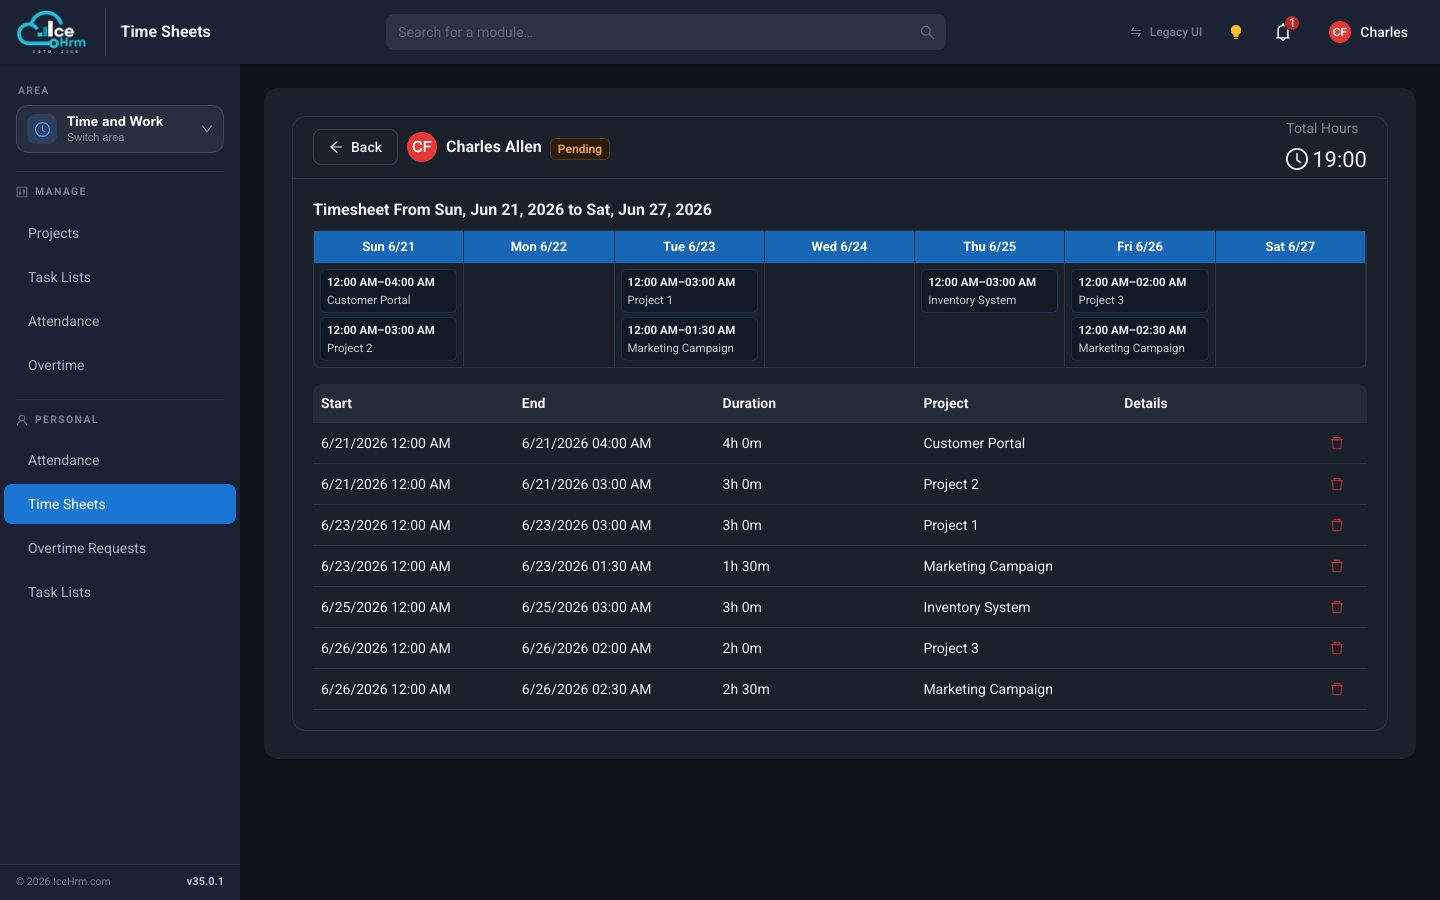
The projects you can pick from are configured by your HR team — see Projects and clients. If a project you need is missing, ask your manager to assign it to you.
Submitting for approval
When your week looks right, submit the timesheet. Its status changes to Pending, and your manager is notified.
Approving timesheets (managers)
- Open Time and Work > Time Sheets and switch to the Direct Reports tab.
- Open a submitted timesheet to see the week in detail.
- Approve or reject it — the employee is notified either way.
The flow at a glance
Employee logs hours against projects
            ↓
Employee submits the week
            ↓
Manager reviews it under Direct Reports
            ↓
Approved (or rejected, with the employee notified)