This documentation is applicable only for IceHrm Open Source.
Sign in with Microsoft Entra ID (Azure AD)
This guide explains how to configure Single Sign-On (SSO) with Microsoft Entra ID (formerly Azure Active Directory) for IceHrm.
Create an Azure Application
Step 1: Access Entra Admin Center
Navigate to https://entra.microsoft.com/ and sign in with your administrator account.
Step 2: Register a New Application
-
Go to Applications > App Registrations
-
Click New Registration
-
Configure the application:
- Name: Enter a name for your application (e.g.,
IceHrm SSO) - Supported account types: Select "Accounts in this organizational directory only (Single tenant)"
- Name: Enter a name for your application (e.g.,
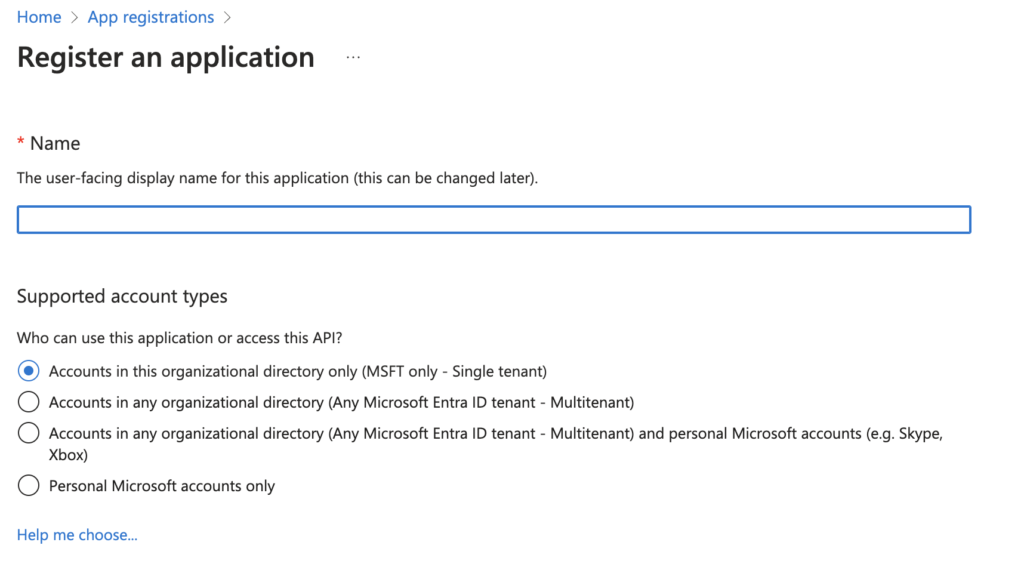
- Click Register
Step 3: Configure Redirect URL
After registration, configure the redirect URI:
-
In your registered application, go to Authentication
-
Under Platform configurations, click Add a platform and select Web
-
Set the Redirect URI to your IceHrm login page URL:
https://your-icehrm-domain.com/login.phpReplace
your-icehrm-domain.comwith your actual IceHrm domain.

- Click Configure
Step 4: Generate Client Secret
-
In your application, navigate to Certificates & secrets
-
Click New client secret
-
Add a description and select an expiration period
-
Click Add
-
Important: Copy the secret Value immediately. It will only be shown once.
Step 5: Note Your Application Details
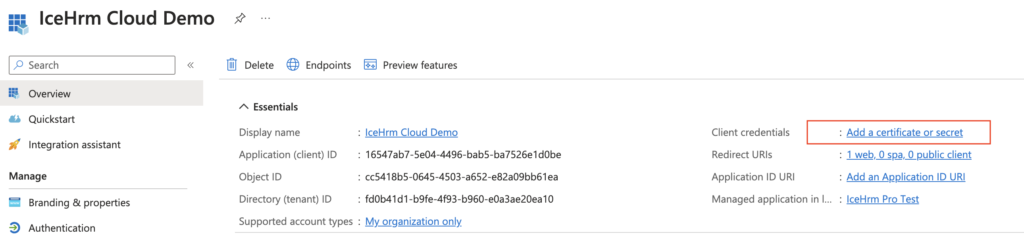
From the Overview page of your registered application, note the following values:
- Application (client) ID
- Directory (tenant) ID
Enable Microsoft Login in IceHrm
Step 1: Access IceHrm Settings
-
Log in to IceHrm as an administrator
-
Navigate to System > Settings
-
Scroll to the Other section
Step 2: Configure Azure AD Settings
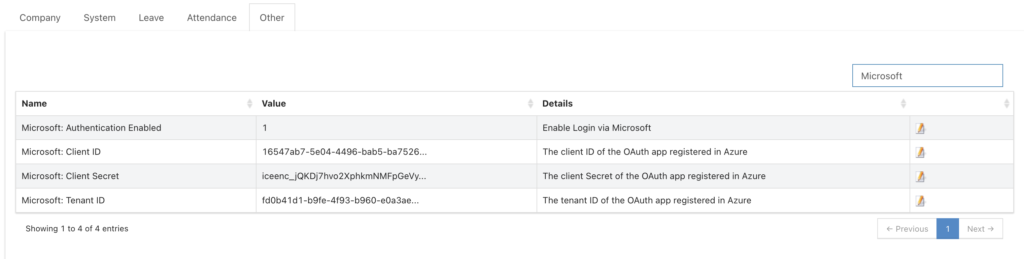
Update the following settings with the values from your Azure application:
| Setting | Value |
|---|---|
| Microsoft Login: Enabled | Yes |
| Microsoft Login: Client ID | Your Application (client) ID |
| Microsoft Login: Client Secret | Your client secret value |
| Microsoft Login: Tenant ID | Your Directory (tenant) ID |
Step 3: Save Configuration
Click Save to apply the settings.
User Configuration
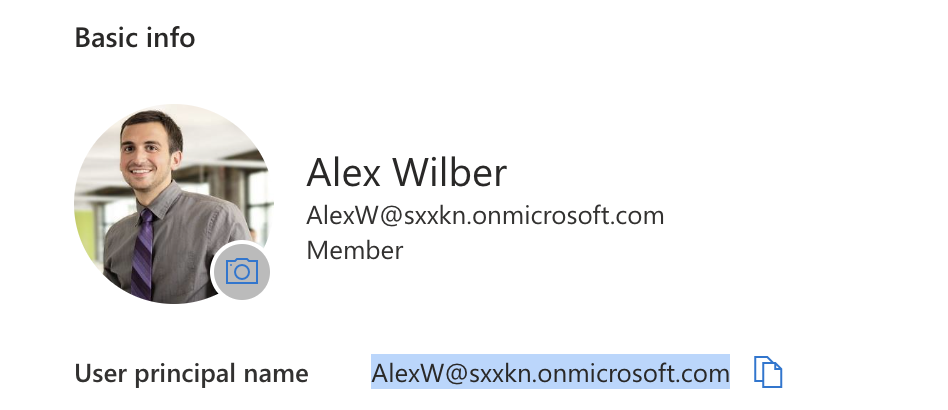
For users to sign in with Microsoft, the User Principal Name in IceHrm must match their email address in the Azure directory.
Azure User Profile
In Azure, each user has a User Principal Name (typically their email address):
IceHrm User Configuration
In IceHrm, ensure the user's profile has the matching email set as the User Principal Name:
-
Navigate to Admin > Users
-
Edit the user account
-
Ensure the User Principal Name matches the Azure AD email
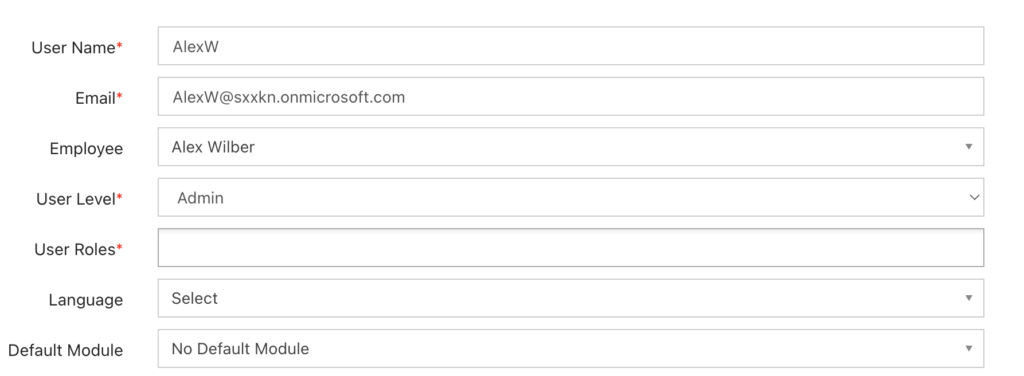
- Save the user record
Testing SSO
After configuration, test the SSO integration:
-
Open an incognito/private browser window
-
Navigate to your IceHrm login page
-
Click the Sign in with Microsoft button
-
Authenticate with your Microsoft credentials
-
Verify you are redirected back to IceHrm and logged in
Troubleshooting
Common Issues
"AADSTS50011: The reply URL specified in the request does not match"
- Verify the redirect URL in Azure matches exactly with your IceHrm login page URL
- Ensure you're using HTTPS
- Check for trailing slashes
"AADSTS7000215: Invalid client secret provided"
- Regenerate the client secret in Azure
- Update the secret in IceHrm settings
- Ensure no extra spaces were copied
User cannot log in via SSO
- Ensure the User Principal Name in IceHrm matches their Azure AD email exactly
- Verify the user exists in both systems
- Check if Microsoft Login is enabled in IceHrm settings